 HikariSub
Perspective
Put a line on a surface seen at an angle by dragging the corners of its box, with a surrounding plane to match a rectangle in the shot.
The Perspective tool draws the active line's text as a box, a four-cornered quad, exactly where the renderer draws it. Drag the corners onto a surface in the picture, and HikariSub writes the tags that make the text sit on it: the rotations, the shear, the scale, \pos and \org.
Choose it on the video's tool rail, or press Q with the pointer over the video. Press Q again to go back to the Position pointer. The Visual tools guide explains the rail, the inspector bar, picking several lines and undo; this page covers what is particular to Perspective.
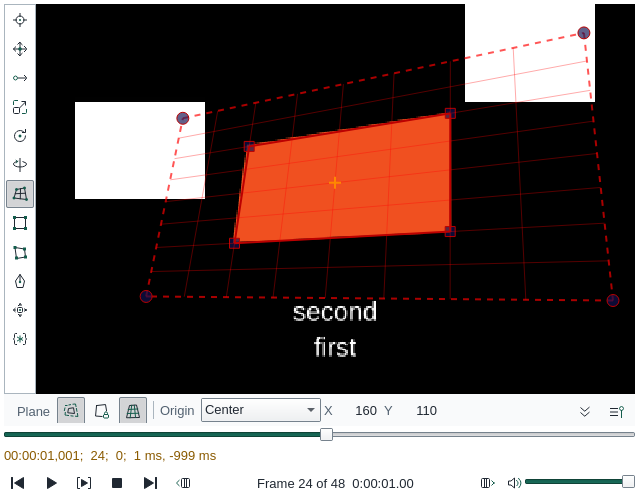
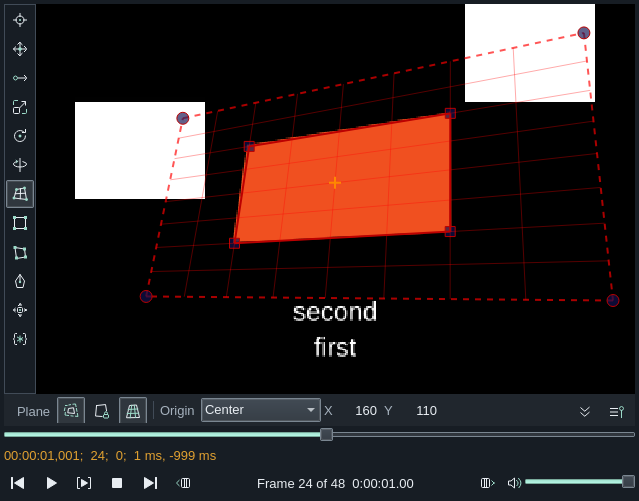
On the video
| You see | Is |
|---|---|
| A solid red quad with square corners | The text's box, as the renderer draws it |
| A dashed quad with round corners | The surrounding plane, with Show surrounding plane on |
| Faint lines | The grid, with Show grid on: 8 × 8 over the plane, or 4 × 4 over the text without it |
| An orange cross | \org, the point the text turns about. In Keep it has a circle you can drag |
Fitting a line to a sign
- Go to a frame where the sign shows, and make the line the active line.
- Press Q. If the line has line breaks,
\N, set Origin to No \fax first. - Turn on Show surrounding plane. A dashed quad twice the text's size appears around it.
- Drag the plane's round corners onto a rectangle in the shot: the sign's edges, a window, a poster. The text tilts with the plane. Turn on Show grid to check its lines against the picture.
- Place the text in the plane. Drag inside the text's quad to slide it across the plane, or drag a square corner to size it. Its perspective stays the plane's.
- Fine-tune with the arrow keys or the bar's values.
Without the plane, drag the text's four corners straight onto the shape you want instead.
Dragging
A press grabs, in this order: the \org circle (in Keep), a square corner, a round corner, the inside of the text's quad, then the inside of the plane. Only the left button does anything.
| Drag | Plane hidden | Plane shown | Plane shown, Lock outer quad on |
|---|---|---|---|
| A square corner | Moves freely: the perspective, rotation, shear, scale and position change | Sizes the text within the plane; the perspective stays | Moves freely and sets the perspective; the plane follows |
| A round corner | Changes the plane, so the perspective; the text keeps its place in it | Resizes the plane only. The line doesn't change | |
| Inside the text | Moves the text | Slides it across the plane, so its size and shape change as it goes | Moves the text and the plane together |
| Inside the plane only | Moves the text and the plane together | Moves the text and the plane together |
While dragging a corner:
- Shift keeps it on one of its two edges.
- Ctrl snaps it to another corner's, or
\org's, x or y when it comes within 10 script pixels. - Alt sizes the quad about its centre.
Shift while moving the quad keeps it on one axis. A double-click brings the nearest corner to the pointer: of the plane while it is shown and unlocked, else of the text. Esc during a drag puts everything back.
A quad can't be folded: a corner that would cross an edge stops where the quad last held its shape.
Arrow keys
With the pointer over the video, the arrows move the corner you grabbed last by one script pixel, and Shift+arrows by a tenth. Before you grab a corner, or after you choose another line, they move the whole quad. Holding a key is one step.
The inspector bar
In a narrow Video panel, the bar's last groups, such as Rotation and Shear, fold under More options at its right end. They work the same there.
| Control | Does |
|---|---|
| Show surrounding plane | Shows the plane around the text |
| Lock outer quad | With the plane shown: the square corners set the perspective, and the round ones only resize the plane |
| Show grid | Draws a grid over the plane, or the text |
| Origin | Where \org goes: see below. X and Y show it |
| Rotation X, Y, Z | \frx, \fry and \frz, in degrees |
| Shear | \fax |
Type a value, or drag its label, to change it. The quad follows and \pos stays. A value that would fold the quad or push it past the plane's horizon is refused. Typing an angle or the shear removes any \fay from the line.
The three buttons and the Origin choice stay as you left them while HikariSub runs, but aren't saved. Changing them never edits the line: they apply from your next drag.
Origin
- Center puts
\orgwhere the quad's diagonals cross, and moves it with the quad. - No \fax chooses the
\orgthat needs no shear. Use it for lines with\N: with a shear, each row of text slides away from the others. - Keep leaves
\orgwhere it is and works the other tags out around it. Drag its circle, with Ctrl to snap to a corner, or type X and Y. The quad stays where it is.
The surrounding plane
The plane is the rectangle of the text's surface, seen in the same perspective. It starts twice the text's size around it, or smaller for a steep quad. If even the text's own size won't fit before the horizon, Show surrounding plane stays off.
Each line keeps its own plane while HikariSub runs: hide it and show it again, or come back to the line, and it is where you left it. It isn't saved in the file, so a reopened file starts each plane from the text again.
What it writes
Into the line's first {…} block, adding one if the text has none:
\pos, or on a\moveline, both of the move's points shifted by the same amount.\org, except on a\moveline without one (see below).- Then only what differs from the line's style:
\fax,\fscx,\fscy,\frz,\frx,\fry, and\xbord,\ybord,\xshadand\yshadscaled with the text, so that the border and shadow keep their size against it.
The same tags are taken out of the other leading blocks first, \fay too. Tags inside \t(…) and after the text starts are left alone. After a \r, the tags go after it, and every one is written.
The renderer turns a \move line with no \org about its moving position, which no \org can match. On such a line Perspective finds a turn about the position itself and writes no \org, or refuses the drag if it can't.
With picked lines, every line gets the active line's position, origin, angles, shear and scale, and keeps its own border and shadow sizes, scaled the same way. That suits the layers of one sign. A \move line keeps its motion.
In Translation mode, the tool edits a line's translation when it has one.
When there is no quad
Perspective draws nothing, and its values are empty, when one box at one size can't describe the line. The usual reasons:
- The text would wrap. Break it yourself with
\N, or add\q2. - The size, font, weight, angle, shear, border or shadow changes after the text starts, such as a
\fson one word. Colours can change. - A
\tanimates anything but colours, transparency,\blur,\beor the clip. - A drawing is followed by text, or sits inside it.
- The font comes only from the file or your Fonts folder, or a character is missing from the font while such a font is loaded, since the renderer could draw it with that font. See Fonts.
- A weight other than normal or bold, such as
\b500, or a vertical@font. - A banner or scrolling Effect.
- A line with no
\posthat stacks on another line the tool can't measure, at the same time and layer. It comes back when the video moves past that line. - Very long lines: more than 64 rows or 4096 characters.
Undo
Each drag, double-click, held arrow key or typed value is one step, named Visual perspective tool, covering every picked line. Resizing a locked plane changes no line, so it isn't a step.