 HikariSub
Visual tools
Position, rotate, scale and clip a line by dragging on the video. Each drag writes the matching override tags into the line.
The tools sit in the rail on the left of the Video panel. Click one, or press its key while the pointer is over the video: P for Text positioning, R for Z rotation. Choosing the tool that is already on goes back to the Position pointer. The rail's checked button is the tool that is on; hover it for its name. When the Video panel is too short for every tool, the rail shows the ones that fit and ends in More tools, a menu of the rest. The tool that is on always stays in view.
Parts of the Video panel
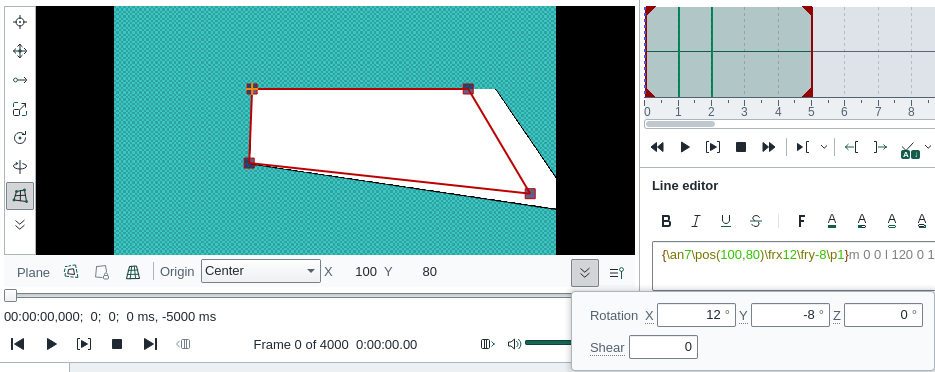
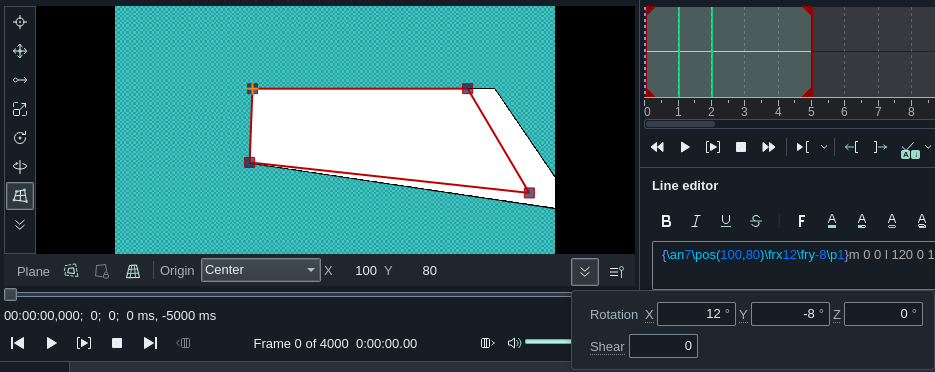
- The tool rail. Hover a tool to see its name and key.
- Handles of the current tool, here the corners of the perspective quad.
- The inspector bar: the tool's options for the active line, on one line. When they don't fit, the last groups fold under More options, where typing or scrubbing a value works at once, as on the bar. The bar has the same height for every tool, so switching tools never resizes the video.
- Exact values. Type a number and press Enter, or drag across the field's label to scrub it; hold Shift to scrub in tenths.
The tools
| Tool | Key | Writes |
|---|---|---|
| Position pointer | X | Nothing; shows the script coordinates under the pointer |
| Text positioning | P | \pos |
| Text moving | G | \move |
| Text scaling | S | \fscx \fscy |
| Text Z rotation | R | \frz, and \org |
| Text X / Y rotation | T | \frx \fry, and \org |
| Perspective | Q | \pos \org \frx \fry \frz \fax \fscx \fscy and the border and shadow sizes |
| Rectangle clipping | C | \clip \iclip |
| Vector clipping | V | \clip with a drawing |
| Vector drawing | D | a \p drawing |
| Position shifter | A | Moves the positions, \move points, clips, drawings and \org already in the lines |
| Hydra | H | Any tag from its list |
The ASS override tags reference explains each tag.
Which lines a tool edits
A tool edits the active line, the one in the Line editor. To edit several lines at once, select them in the Grid and press Pick selected lines at the right end of the inspector bar; the tools then edit the picked lines, not the active line, until you press Clear picked lines. Selecting lines in the Grid is not enough on its own.
The tools need the line on screen. While the active line is not at the video's time, the video says Line is not visible on video or has zero duration and the tools wait. Most tools leave comment lines alone; Vector drawing and Vector clipping work on them.
When a line has no \pos, the handles start where the line would show, from its alignment and margins.
Using each tool
- Position pointer: a cross follows the pointer with its coordinates. It has no inspector bar: its X, Y and Copy video position sit at the end of the video's times line, and Copy video position copies them. Ctrl+click or middle-click puts
\posthere. Only with this tool does the wheel zoom the video, a right-click open its menu and a double-click go full screen. - Text positioning: drag anywhere on the video to move the line; you need not grab it. Shift locks to one axis. A right-click puts the line at the pointer. Set position by rectangle places it by a rectangle you draw instead, using the alignment you choose.
- Text moving: the left button sets the start point and the right button the end point. The bar's Start and End fields include the times, in milliseconds from the line's start. Set movement using 2 points and the video position builds the move from a point on two frames.
- Text scaling: left-drag scales the width, right-drag the height, and middle-drag or Shift+drag both. Set scale by rectangle scales the line to fit a rectangle.
- Text Z rotation: drag around the origin cross to turn the line; drag the cross to move
\org. Set angle from 2 points takes the angle from two points you click along something in the picture. - Text X / Y rotation: left-drag turns about the vertical axis (
\fry), right-drag about the horizontal axis (\frx), middle-drag both. - Rectangle clipping: drag a rectangle, then drag its edges, corners or inside. Invert clip switches between
\clipand\iclip. - Vector clipping and Vector drawing: the bar's modes are Move points, Add line, Add Bézier curve, Add B-spline, Add separate point and Delete point; the wheel steps through them. Ctrl+click selects several points, and Alt while dragging snaps to another point's x or y. Vector drawing's Shape list draws a ready-made shape into a rectangle you drag; Edit shapes… adds your own.
- Position shifter: drag to move everything the Move toggles choose (positions,
\movestart or end points, clips, drawings,\org) by the same amount in every line. - Hydra: pick a tag, then drag sideways on the video or turn the wheel to change its value. Set, Add, Multiply and Gradient decide how the value is applied across characters or lines.
The tools work only on ASS files.
Try a rotation
Edit the line and the preview follows. Drag the slider to see the \t animation at any moment.
Nudging with the arrow keys
While the pointer is over the video, the arrow keys move what the tool edits by one script pixel, and Shift+arrows by a tenth. With Text moving, Alt+arrows move the end point. Text scaling's arrows change the scale by 1%.
The arrows nudge with Text positioning, Text moving, Text scaling, Perspective, both clipping tools, Vector drawing and the Position shifter. In Vector clipping and Vector drawing they move the selected points.
Over the video, the arrows nudge instead of stepping frames. Move the pointer to the Grid to step frames with them again. With the Position pointer, the rotations and Hydra, the arrows step frames as usual.
Fitting text to a surface
With Perspective (Q), drag the corners of the quad onto the surface the text should sit on. HikariSub works out the rotation, shear and origin, and the inspector bar shows the values as you drag.
- Shift while dragging a corner keeps it on one axis of the plane, Ctrl snaps it to another corner's x or y, and Alt scales the quad from its centre.
- Drag inside the quad to move it, or double-click to bring the nearest corner to the pointer.
- Show surrounding plane adds an outer quad: match it to a rectangle in the shot, such as a sign's edges, then place the text inside it. Show grid draws a grid over it.
- Origin sets where
\orggoes: Center of the quad, No \fax for lines with line breaks, or Keep to leave it where it is and drag it yourself.
Perspective needs a line that one box can describe. It does nothing for lines that change size or font partway through, wrap, or animate their shape.
Zoom
With the Position pointer on, the wheel zooms the video around the pointer. Video › Zoom video lets you drag and resize a zoom frame; the tools are hidden while you do, and Return ends it. Video › Turn off video zoom, or Ctrl+Shift+Z over the video, goes back to the whole picture. The tools follow the zoom.
Sharp previews
The handles and guides are drawn over the picture at the screen's resolution, so they stay sharp at any zoom, and keep their size on a high-DPI screen.
The subtitles themselves are drawn at the video's resolution and scaled with the picture, as in most players. On a large or high-DPI screen they can look soft. To draw them at the size the picture takes on screen instead, set File › Settings › Video › Subtitles on video › Preview subtitles at to Screen size (sharp). The layout is the same either way, and so are copied or saved frames, which stay at the video's size. The setting also applies to full screen and to the previews in the Style manager, the font picker and the Template editor. It is available with libass, not with a VSFilter renderer.
Undo and cancelling
Each drag is one step in the history, named after the tool, such as Visual scaling tool. So is a typed or scrubbed value. If the Line editor has changes you have not applied, they are applied first, as a step of their own.
Press Esc during a drag to drop it; the handles go back and nothing is written.